
EvaResto T1 Adjustable Steering Stop Install Guide

Thank you for purchasing our Bolt On Steering Stop kit. This part works on Left and Right Hand Drive T1 based vehicles from 1958-, or earlier cars, with later style steering boxes fitted.
This product is primarily designed to fit our own line of products, and thus will fit as fully bolt-on and fuss free. However due to the nature of the vast aftermarket classic VW parts market, we cannot guarantee a perfect installation for everybody's setup!
Parts supplied:
- Steering stop + Steering Box clamp (Raw/Powdercoated)
- 2x M10x35 Cap Headed bolts
- 2x M10 Washers
- 2x M8 Bolts
- 2x M8 Plain nuts
Preparation
Get yourself and the car ready for the job.
Ensure vehicle is safely lifted and supported, using safe and correctly graded equipment. Access to underneath the front beam is necessary.
Car Preparation


Pictured here is the new item with the part it replaces fully.
Step 1
Offer the new steering box clamp up into position.
This can be awkward, so we recommend going in from behind the steering box, and 'hooking' the long side of the bracket over the steering pitman arm.
Step 2
Then, with this loosely in position, prepare the supplied M10 Bolts with the application of High Strength Loctite/thread locker.

Step 3
Fit these bolts into position loosely by hand, with the help of a mid-size socket extention and correct internal hex/allen head bit/tool.


Step 4
With these bolts in place and finger tight, ensure proper positioning of the steering box. The box must be centralised, and in-line with the steering column, with as little 'twist' as possible present in the rubber coupling.
Tighten these bolts down with a ratchet equally, then finish with a Torque Wrench. Apply 22 ft.lbs, factory spec.


The bracket is now fully in place.
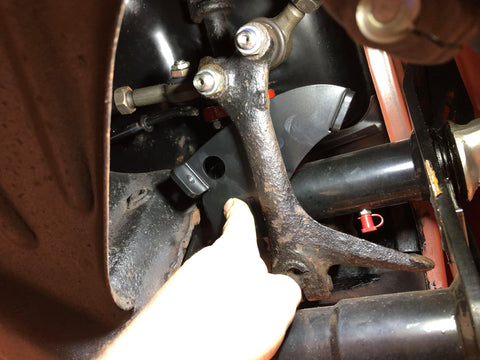
Step 5
Now, the M8 Stopper bolts can be installed. They can either be fitted like this:

or with the jam/locking nuts on the outside of the bracket for more steering range/angle.
Step 6
It is wise to keep an eye on all new suspension parts after fitting. We recommend taking a look at this product after your first drive, and then after covering 100 miles. Ensure nothing has moved, come loose or changed in any way. After this, no maintenance is required!